Es liegt eine besondere Magie darin, Werkzeuge für Ihre eigenen Wellness-Rituale zu kreieren. Wenn Sie den beruhigenden Duft von Weihrauch lieben, aber noch keinen Halter gefunden haben, der wirklich zu Ihrem Stil passt, ist dies das perfekte Projekt für Sie. Ein selbst gebastelter Weihrauchhalter ist mehr als nur ein Handwerk; es ist eine Gelegenheit, Ihre persönliche Energie in Ihren heiligen Raum zu bringen und ein Stück zu schaffen, das sowohl funktional als auch tiefgründig ist. Vergessen Sie herkömmliche Räucherstäbchen aus dem Laden – wir stellen Ihnen fünf einfache und kreative Ideen für selbst gebastelte Weihrauchhalter vor, die Sie noch heute umsetzen können.
Egal, ob Sie bereits ein erfahrener Bastler sind oder gerade erst mit dem Heimwerken beginnen: Diese Projekte verwenden einfache, leicht zugängliche Materialien, um ein schönes Zuhause für Ihre Lieblings-Räucherstäbchen oder -kegel zu gestalten. Los geht's!

Warum sollten Sie Ihren eigenen Räucherstäbchenhalter herstellen?
Das Basteln eines eigenen Räucherstäbchenhalters ist eine lohnende Erfahrung, die über das bloße Sparen hinausgeht. Gestalten Sie Ihren Meditations- oder Entspannungsbereich mit einem Objekt, das Ihre einzigartige Ästhetik widerspiegelt. Der kreative Prozess selbst kann eine Form der Achtsamkeit sein und Sie tiefer mit Ihrer Praxis verbinden. Sie wählen Materialien, Form und Farben und stellen sicher, dass das fertige Stück perfekt zu Ihrer Wohnkultur und Ihren spirituellen Absichten passt.
Wichtige Sicherheitstipps, bevor Sie beginnen
Bevor Sie sich in diese Projekte stürzen, ist Sicherheit oberstes Gebot. Die Hauptaufgabe eines Räucherstäbchenhalters besteht darin, brennendes Material sicher aufzubewahren. Beachten Sie diese wichtigen Punkte:
- Verwenden Sie nicht brennbare Materialien: Wählen Sie immer Materialien, die nicht brennen, wie Ton, Stein, Keramik, Metall oder Glas. Achten Sie bei der Verwendung von Holz darauf, dass es richtig behandelt ist und die Brennspitze durch die Konstruktion weit vom Holzsockel entfernt ist.
- Sorgen Sie für Stabilität: Ihr Halter muss stabil sein und einen flachen Boden haben, damit er beim Anzünden des Räucherstäbchens nicht umkippt.
- Fangen Sie die gesamte Asche auf: Gestalten Sie Ihren Halter so breit oder lang, dass er die gesamte herabfallende Asche auffängt. Dies verhindert Brandflecken auf Ihren Möbeln und verringert die Brandgefahr.
- Niemals unbeaufsichtigt lassen: Genau wie eine Kerze sollten Sie brennendes Räucherstäbchen niemals unbeaufsichtigt lassen. Halten Sie es von Zugluft, Vorhängen, Haustieren und Kindern fern.
Projekt 1: Der minimalistische Halter für lufttrocknenden Ton
Lufttrocknender Ton ist ein fantastischer Ausgangspunkt für jeden angehenden Bastler. Er ist fehlerverzeihend, kostengünstig und benötigt keinen speziellen Brennofen. Sie können ihn in nahezu jede Form bringen, von einer einfachen flachen Scheibe bis hin zu einer filigranen Skulptur. Dies ist eine der beliebtesten Methoden, um zu Hause einen Räucherstäbchenhalter herzustellen .
Was Sie brauchen:
- Lufttrocknender Ton (Terrakotta, Weiß oder Steineffekt)
- Eine kleine Schüssel Wasser
- Ein Räucherstäbchen (zum Ausmessen des Lochs)
- Nudelholz oder Glasflasche
- Bastelmesser oder altes Buttermesser
- Feinkörniges Schleifpapier
- Acrylfarbe und Versiegelung (optional, zur Dekoration)

Schritt-für-Schritt-Anleitung:
- Kneten und Rollen: Beginnen Sie mit einer kleinen Tonkugel und kneten Sie sie eine Minute lang, um Luftblasen zu entfernen. Rollen Sie sie auf einer ebenen Fläche auf eine Dicke von etwa ¼ Zoll aus.
- Schneiden und Formen: Schneiden Sie mit Ihrem Messer die gewünschte Form aus – einen Kreis, ein langes Rechteck, ein Blatt oder eine einfache organische Form. Sie können auch einen kleinen „Quetschtopf“ oder eine Schüssel formen.
- Loch formen: Solange der Ton noch weich ist, stecke ein Räucherstäbchen vorsichtig im gewünschten Winkel hinein. Wackele leicht daran, um sicherzustellen, dass das Loch groß genug ist.
- Vollständig trocknen: Lassen Sie den Ton gemäß den Anweisungen auf der Verpackung an der Luft trocknen, normalerweise 24–48 Stunden. Drehen Sie ihn nach der Hälfte der Zeit um, um sicherzustellen, dass er gleichmäßig trocknet.
- Schleifen und Dekorieren: Sobald das Objekt vollständig ausgehärtet ist, glätten Sie alle Ecken und Kanten mit Schleifpapier. Anschließend können Sie Ihr Werk bemalen und für den letzten Schliff eine nicht brennbare Versiegelung auftragen.
Eine visuelle Anleitung zum Herstellungsprozess finden Sie in diesem hilfreichen Video, das Sie durch die Herstellung eines einfachen und eleganten Halters führt.

Projekt 2: Der erdige Natursteinhalter
Dies ist wohl der einfachste DIY-Räucherstäbchenhalter und erfordert fast kein Werkzeug. Er ist perfekt, um einen Hauch der erdenden Energie der Natur in Ihr Zuhause zu bringen. Der Schlüssel liegt darin, den richtigen Stein zu finden – einen, der sowohl schön als auch funktional ist.
Was Sie brauchen:
- Ein flacher, stabiler Stein mit einer Breite von mindestens 2-3 Zoll
- Eine Bohrmaschine mit einem kleinen Bohrer (optional, für ein dauerhaftes Loch)
- Klebemasse oder Modelliermasse (Option ohne Bohren)
Anweisungen:
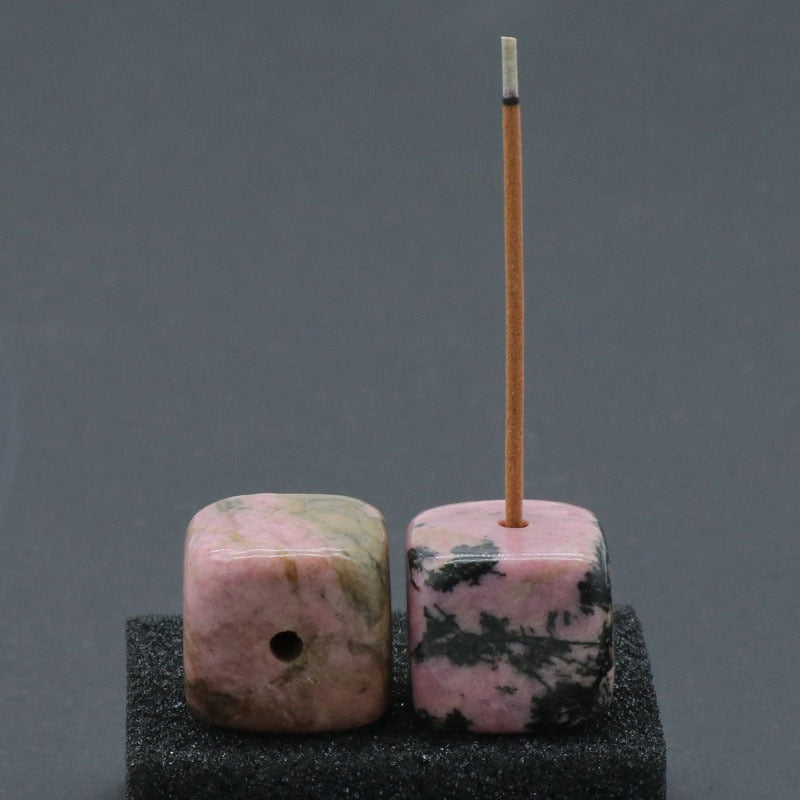
Suchen Sie sich einfach einen Stein mit flacher Unterseite, der nicht wackelt. Für eine dauerhafte Lösung können Sie vorsichtig ein kleines Loch in die Mitte bohren. Eine viel einfachere, werkzeuglose Lösung ist, ein kleines Kügelchen Klebemasse oder Modelliermasse auf den Stein zu legen und Ihr Räucherstäbchen hineinzudrücken. Dadurch wird das Stäbchen beim Abbrennen sicher aufrecht gehalten. Wenn Sie die Stabilität von Stein mit der Schönheit der Kristallenergie kombinieren möchten, kann ein spezielles Stück Ihren Raum verschönern.
Quadratischer Räucherstäbchenhalter aus natürlichem Quarzstein
$29.99 $39.99
Verleihen Sie Ihrem Altar mit diesem kompakten Räucherstäbchenhalter aus Quarz Kristallenergie – perfekt für achtsame DIY-Aufbauten.
Produkt entdeckenProjekt 3: Der Upcycling-Brenner aus Blechdosen
Mit diesem umweltfreundlichen Projekt hauchen Sie einer alten Blechdose neues Leben ein. Dieser selbstgemachte Räucherstäbchenhalter eignet sich hervorragend zum Auffangen von Asche und lässt sich auf unzählige Arten dekorieren. Eine saubere Aluminiumdose eignet sich perfekt.
Was Sie brauchen:
- Eine saubere, leere Blechdose (z. B. von Pfefferminz oder Tee)
- Ein Hammer und ein Nagel
- Sprühfarbe oder Acrylfarbe
- Dekorative Elemente (optional)
Schritt-für-Schritt-Anleitung:
- Bereiten Sie die Dose vor: Stellen Sie sicher, dass Ihre Dose vollständig sauber und trocken ist.
- Loch bohren: Legen Sie den Deckel auf eine geschützte Fläche. Schlagen Sie mit Hammer und Nagel vorsichtig ein Loch in die Mitte des Deckels, gerade groß genug für ein Räucherstäbchen.
- Dekorieren: Dose und Deckel in der gewünschten Farbe bemalen. Vollständig trocknen lassen. Schablonen, Zeichnungen oder andere Verzierungen können hinzugefügt werden.
- Zusammenbauen: Füllen Sie die Dose mit etwas Sand oder Salz, um sie zu beschweren und für zusätzliche Stabilität zu sorgen. Setzen Sie den Deckel auf, stecken Sie Ihr Räucherstäbchen hinein und genießen Sie!
[Sammlungs-Schieberegler]
Projekt 4: Der rustikale Zweig- und Holzhalter
Für eine wirklich rustikale und natürliche Ästhetik eignet sich ein schönes Stück Holz oder eine kleine Scheibe Holz als Halter. Dabei ist äußerste Vorsicht geboten , damit das brennende Räucherwerk niemals mit dem Holz selbst in Berührung kommt.
Was Sie brauchen:
- Ein kleines, flaches Stück Holz oder ein dicker, stabiler Zweig
- Ein Bohrer mit einem Bohrer, der etwas größer als ein Räucherstäbchen ist
- Sandpapier
Schritt-für-Schritt-Anleitung:
- Wählen Sie Ihr Holz: Wählen Sie ein Stück Holz, das flach liegt und dick genug ist, um keine Brandgefahr darzustellen.
- Bohren Sie ein Loch: Bohren Sie vorsichtig schräg ein Loch in die Mitte des Holzes. Achten Sie darauf, dass der Winkel so ist, dass das Räucherstäbchen über der Mitte des Holzes hängt, um die Asche aufzufangen.
- Schleifen: Glätten Sie das gesamte Stück mit Schleifpapier für ein sauberes Finish. Sie können es naturbelassen oder mit einem nicht brennbaren Finish versiegeln.
Sicherheit geht vor: Diese Methode erfordert sorgfältige Überwachung. Achten Sie darauf, dass die brennende Spitze des Räucherstäbchens und die heiße Asche niemals das Holz berühren. Für zusätzliche Sicherheit stellen Sie den Holzhalter während der Anwendung auf einen Untersetzer aus Keramik oder Schiefer. Weitere Informationen zur Schaffung einer sicheren Umgebung für die Aromatherapie finden Sie in dieser Studie der National Institutes of Health zu den Auswirkungen der Aromatherapie .
Projekt 5: Der mystische DIY-Rückfluss-Kegelbrenner
Ein DIY-Projekt mit Rückfluss-Räucherstäbchen ist etwas anspruchsvoller, erzeugt aber einen atemberaubenden Wasserfall-Raucheffekt. Das Geheimnis liegt in der Schaffung einer Hohlkammer mit einem präzisen Loch, durch das der kühlere, dichtere Rauch aus einem Rückflusskegel nach unten strömen kann.
Was Sie brauchen:
- Lufttrocknen oder Polymerton
- Bildhauerwerkzeuge oder ein Bastelmesser
- Ein glatter, konischer Gegenstand (wie eine Stiftkappe) zur Bildung der Kammer
Schritt-für-Schritt-Anleitung:
- Gestalten Sie Ihre Form: Skizzieren Sie ein Design mit einer kleinen, flachen Plattform für den Kegel und einem Weg, durch den der Rauch nach unten strömt. Beliebte Formen sind Berge, Vulkane oder Lotusblumen.
- Bauen Sie die Struktur: Bauen Sie mit Ton die äußere Form Ihres Brenners. Stellen Sie sicher, dass er innen hohl ist.
- Erstellen Sie den Luftstromkanal: Dies ist der wichtigste Schritt. Bohren Sie ganz oben, wo der Kegel sitzen wird, ein kleines Loch. Dieses Loch muss mit der Hohlkammer im Inneren verbunden sein. Erstellen Sie dann unten oder entlang des „Wasserfall“-Pfades, aus dem der Rauch austreten soll, ein größeres Austrittsloch.
- Verfeinern und trocknen: Glätten Sie alle Oberflächen und stellen Sie sicher, dass die obere Plattform perfekt mit dem inneren Kanal ausgerichtet ist. Lassen Sie den Ton gemäß den Anweisungen vollständig trocknen.
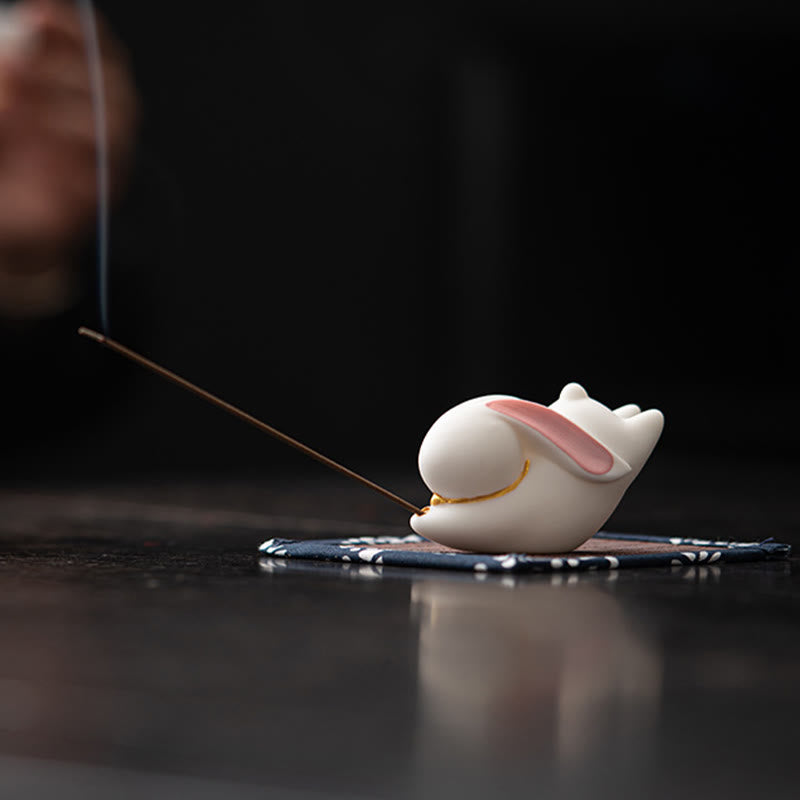
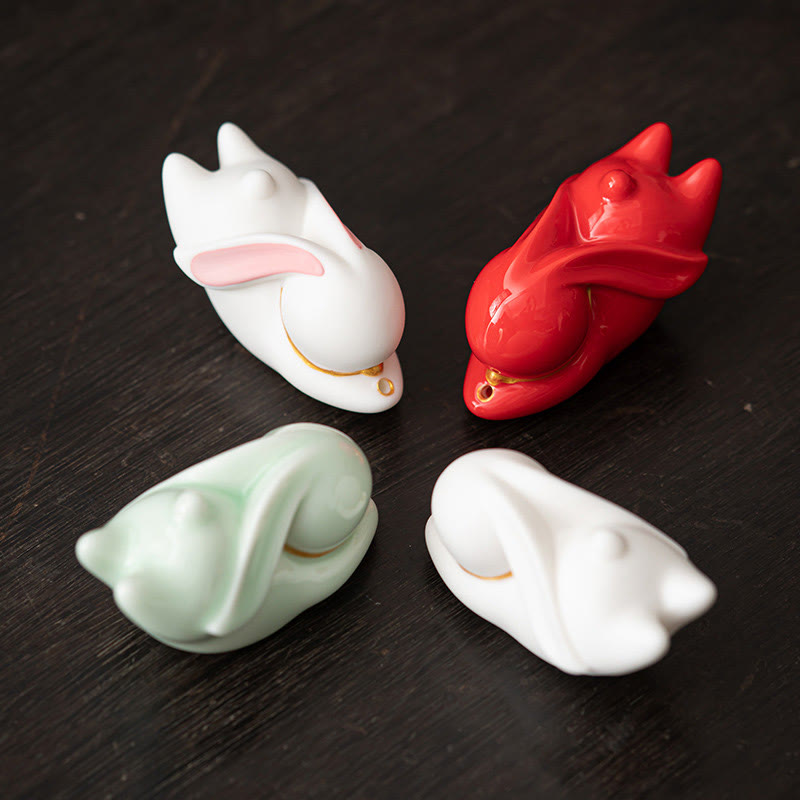
Lassen Sie sich von diesen handwerklichen Brennern inspirieren
$25.90
$37.90
Ein bezaubernder Räucherbrenner aus Keramik mit Bambussockel – ideal als fertige Option oder als Inspiration für selbstgemachte Formen. Mehr erfahren ➔
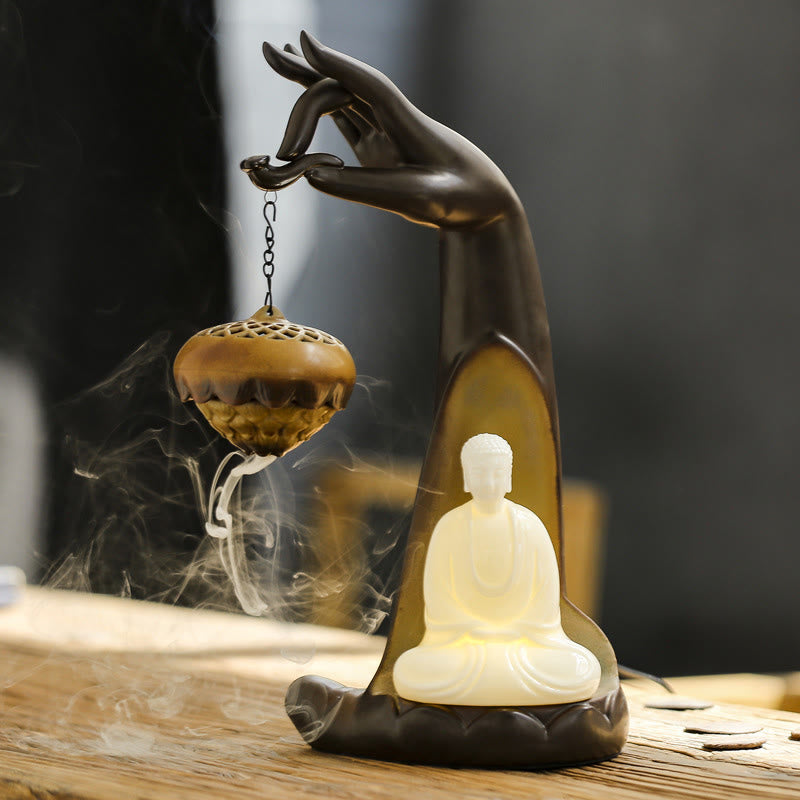
$259.90
$369.90
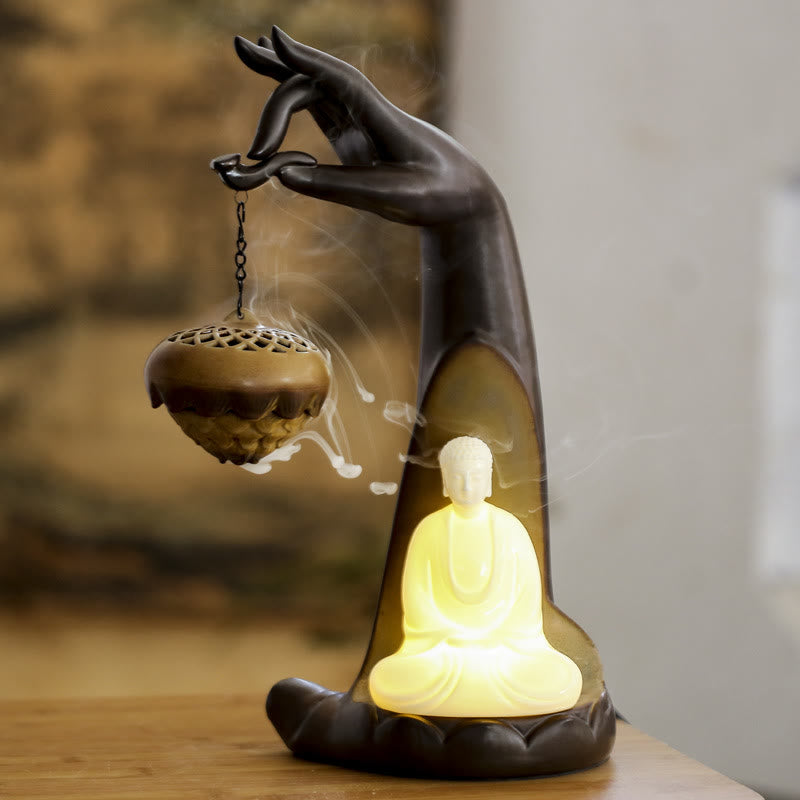
Schaffen Sie mit diesem LED-Rückflussbrenner einen meditativen Mittelpunkt – nutzen Sie ihn als Inspiration für ein DIY-Rückflusskegelprojekt. Mehr erfahren ➔
Starten Sie noch heute Ihr DIY-Räucherstäbchenhalter-Projekt
Die Herstellung eines eigenen Räucherstäbchenhalters ist eine einfache und freudvolle Möglichkeit, Ihre Aromatherapie- und Achtsamkeitsübungen zu verbessern. Mit nur wenigen Grundmaterialien können Sie ein Stück herstellen, das nicht nur schön ist, sondern auch Ihre Seele widerspiegelt. Wählen Sie das Projekt, das Sie am meisten inspiriert, sammeln Sie Ihre Materialien und genießen Sie den meditativen Prozess, etwas mit Ihren eigenen Händen zu schaffen. Ihr heiliger Ort wird dadurch noch besonderer.
Häufig gestellte Fragen zu DIY-Räucherstäbchenhaltern
Zu den einfachsten und zugänglichsten Materialien für einen selbstgemachten Räucherstäbchenhalter gehören lufttrocknender Ton, Natursteine, saubere Metalldosen oder -büchsen und kleine Holzstücke . Viele Projekte können mit Gegenständen durchgeführt werden, die Sie bereits zu Hause haben oder leicht in der Natur finden können.
Um sicherzustellen, dass Ihr Halter die gesamte Asche auffängt, sollte er eine möglichst große Oberfläche haben. Eine lange, trogartige Form (oft als „Boot“ bezeichnet), eine flache Scheibe mit einem Durchmesser, der größer ist als die Länge des Räucherstäbchens, oder eine Schalenform, die die Asche in ihren Wänden auffängt, sind gute Optionen.
Ja, Sie können einen Rückfluss-Räucherstäbchenhalter selbst herstellen, meist aus Ton. Der Schlüssel liegt darin, eine hohle Kammer in Ihr Design zu formen. Sie müssen oben ein kleines Loch für den speziellen Rückflusskegel und unten ein weiteres Loch in der Kammer schaffen, damit der Rauch austreten und seinen charakteristischen Kaskadeneffekt erzeugen kann.
Das Verbrennen von Räucherstäbchen in handgefertigten Haltern ist völlig unbedenklich, sofern Sie zwei wichtige Regeln beachten. Erstens: Verwenden Sie nur nicht brennbare und hitzebeständige Materialien wie Ton, Keramik, Stein oder Metall. Zweitens: Stellen Sie sicher, dass der Halter einen stabilen, flachen Stand hat, damit er nicht leicht umkippen kann.
Der einfachste Weg, einen Räucherstäbchenhalter ohne Werkzeug herzustellen, besteht darin, einen geeigneten Stein mit flachem Boden zu finden. Mit einem kleinen Stück wiederverwendbarer Klebemasse oder Modelliermasse können Sie dann einen kleinen Sockel auf dem Stein formen, der Ihr Räucherstäbchen aufrecht hält. Sie können auch einfache Formen aus lufttrocknender Tonerde von Hand formen, ohne dass Sie dafür andere Werkzeuge als Ihre Hände benötigen.